
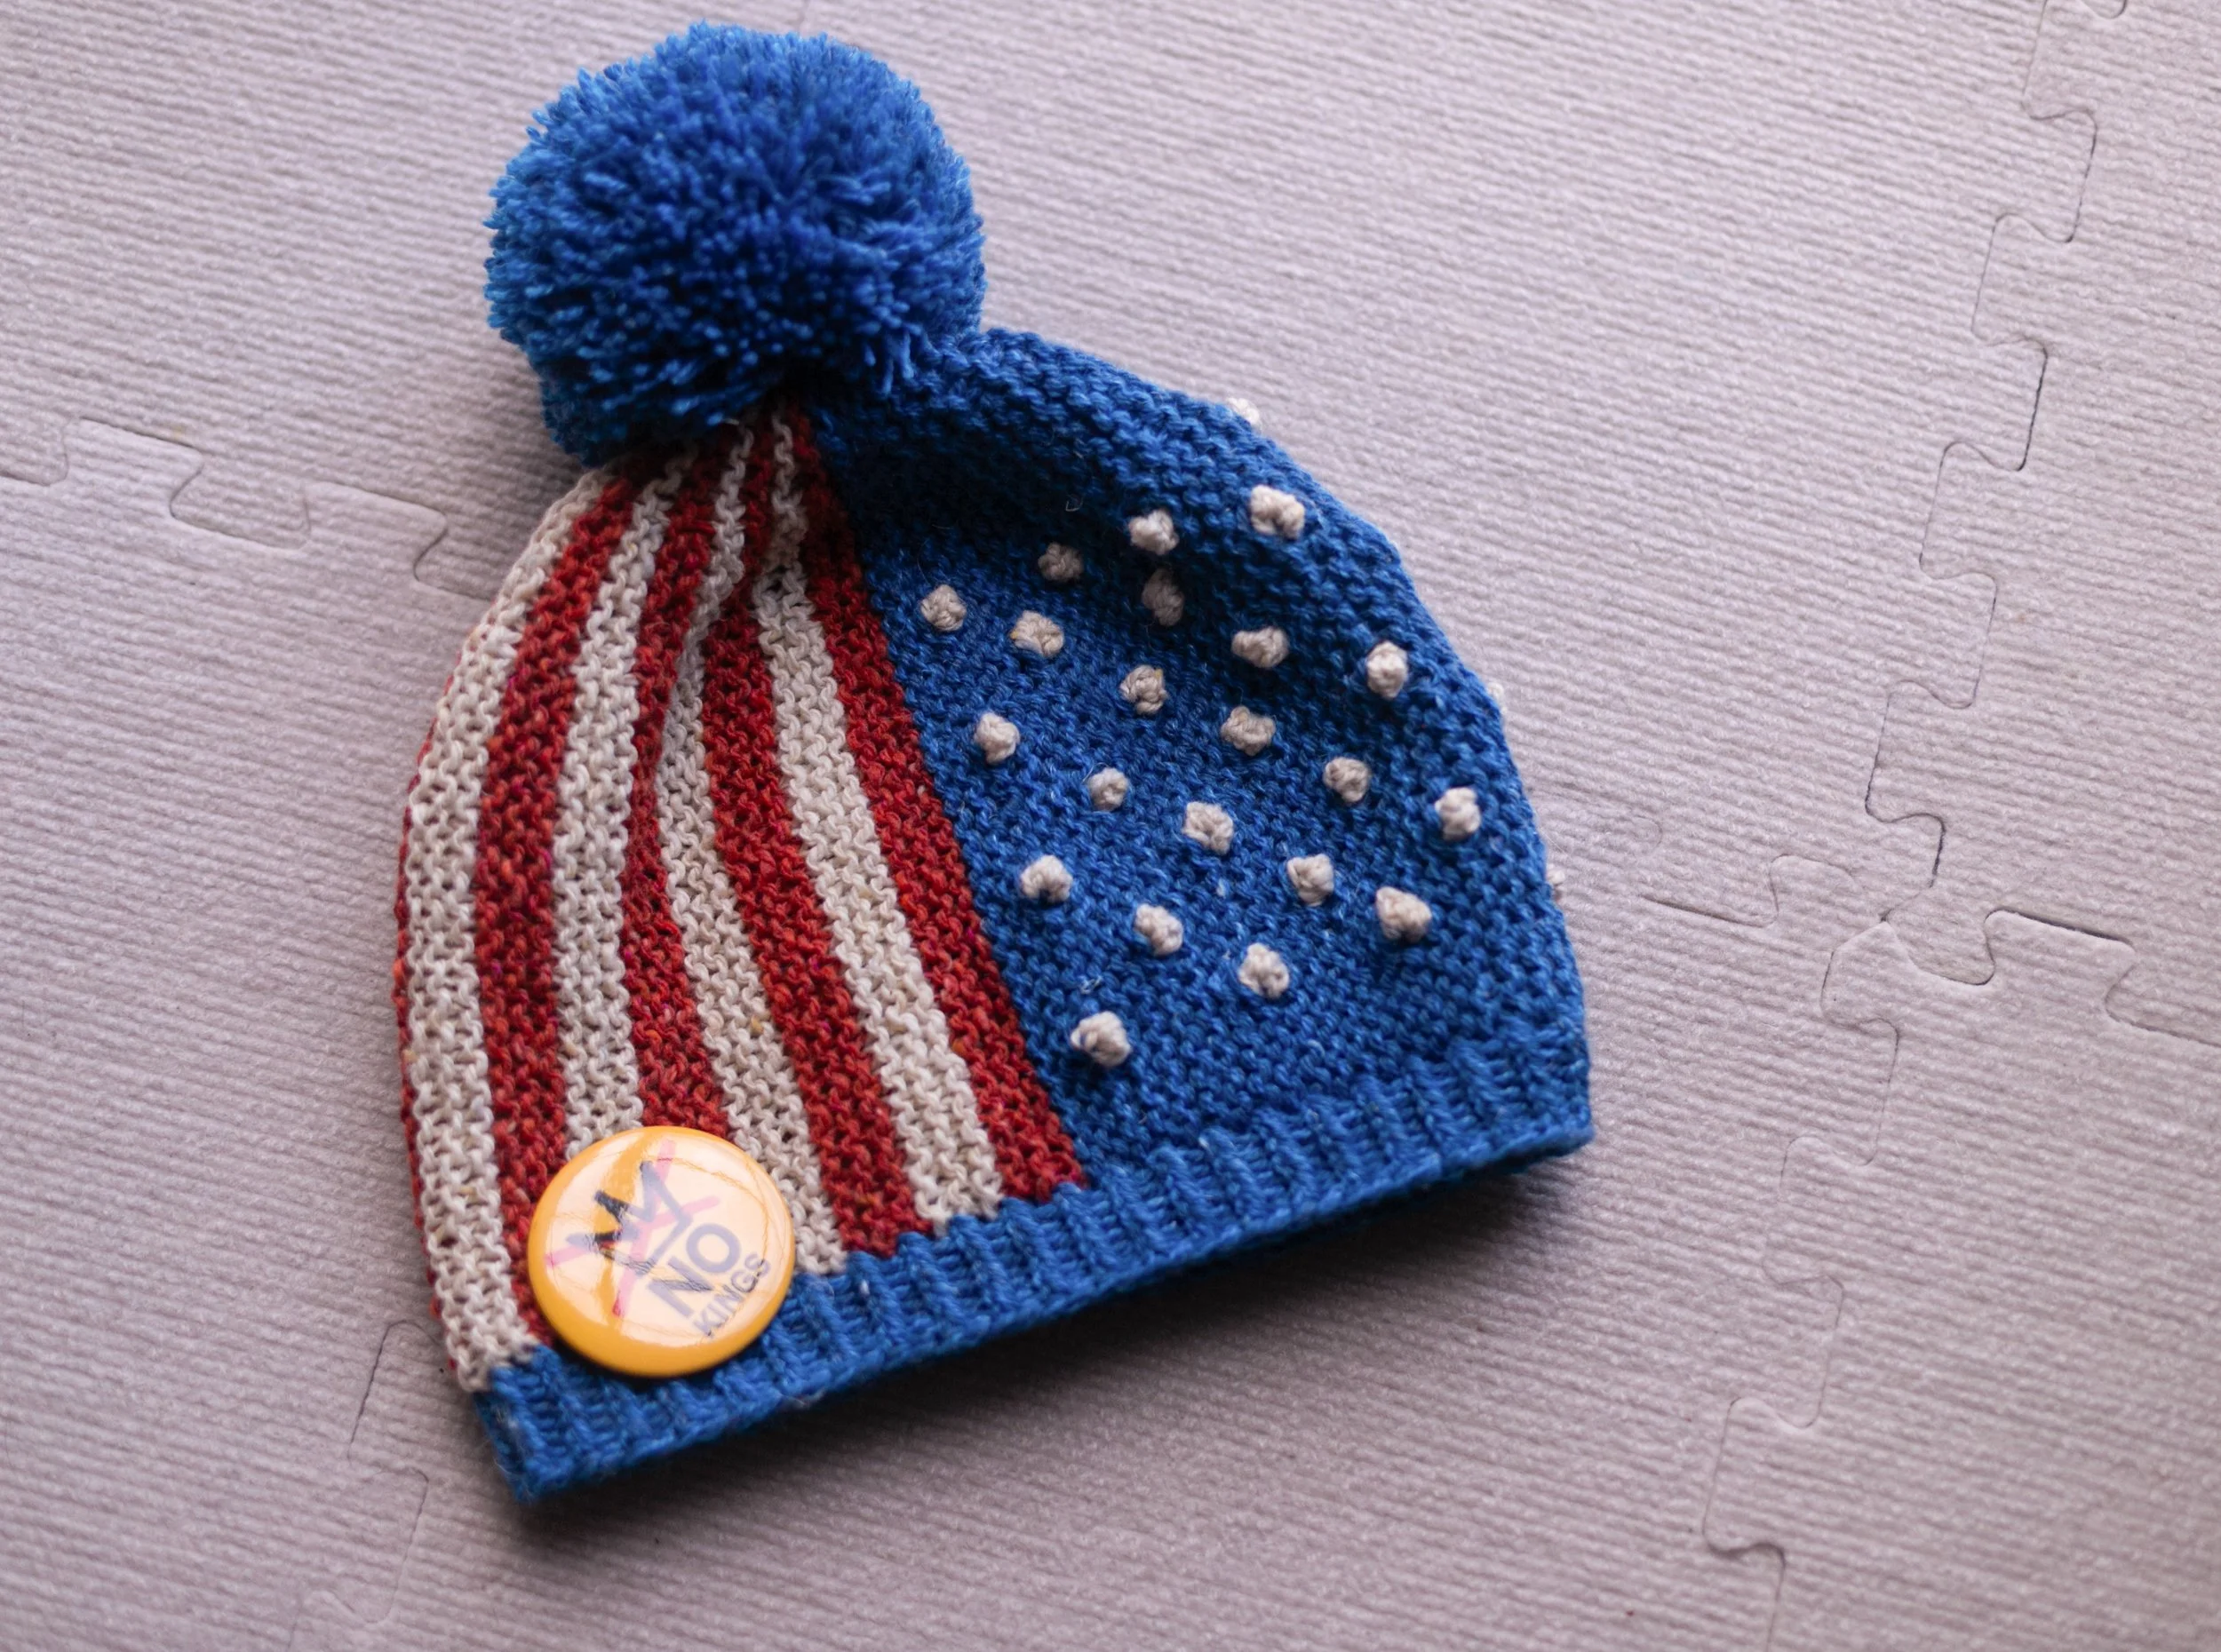
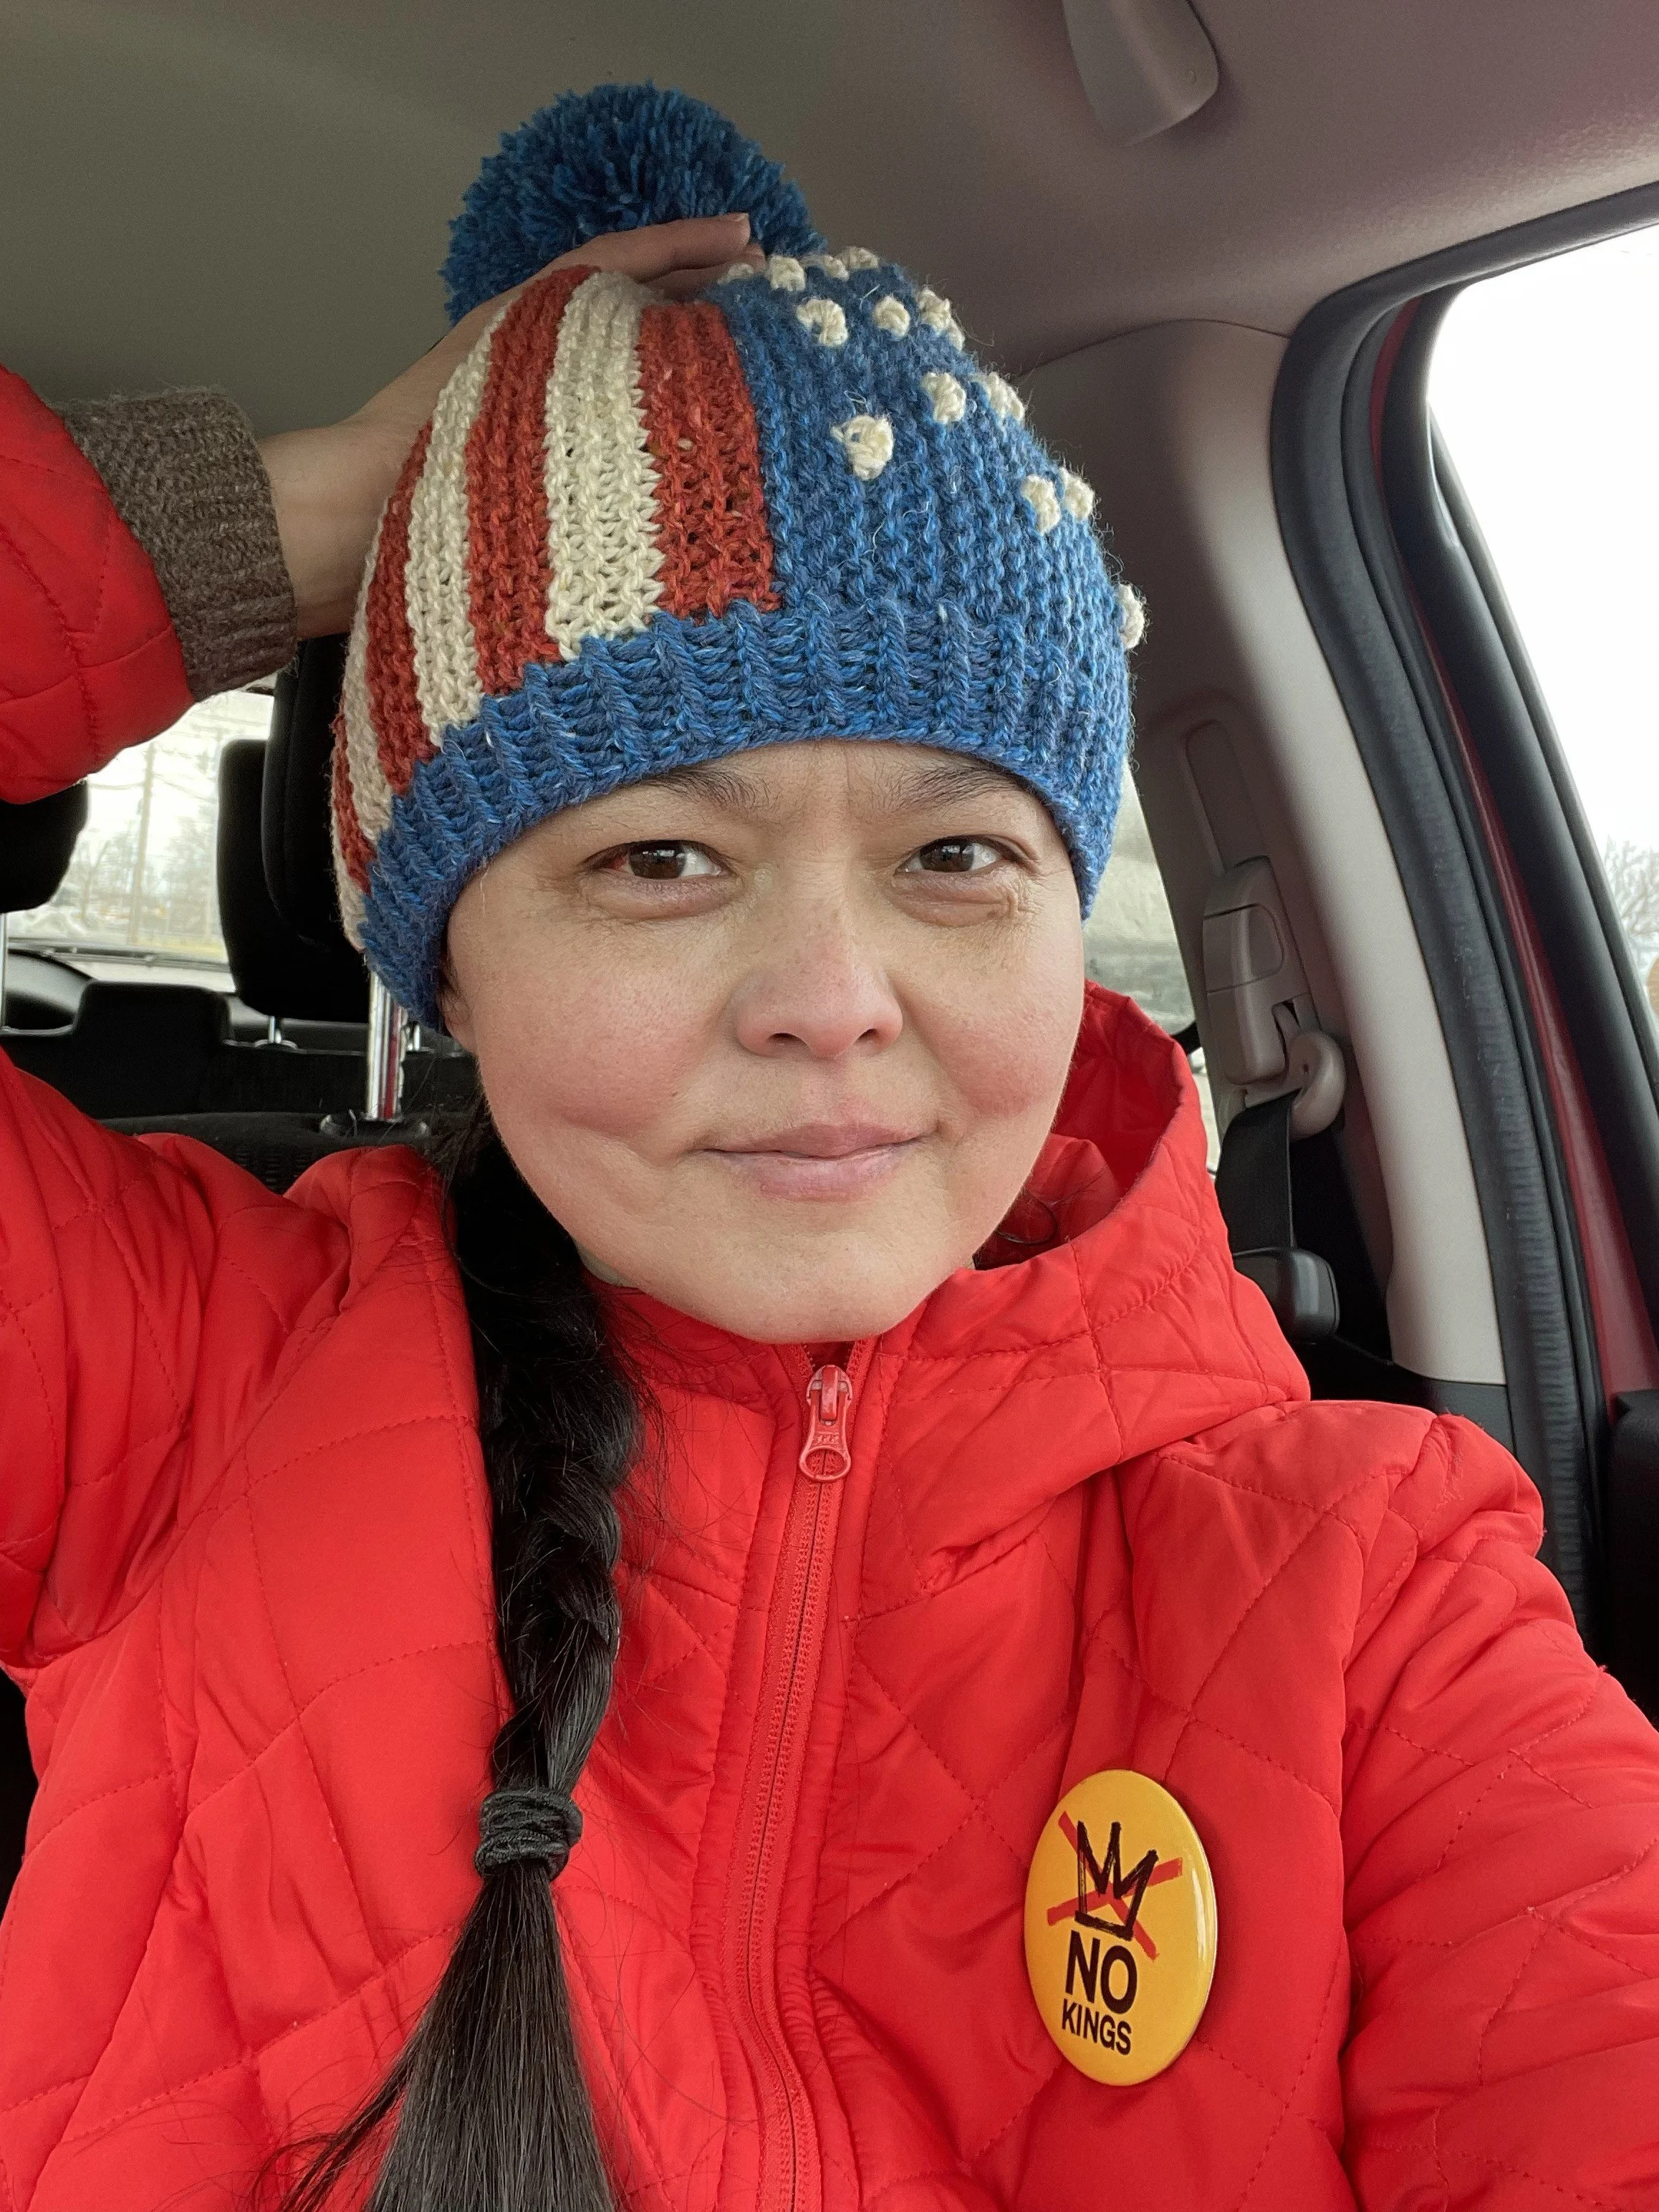
How to Knit a USA Flag-Inspired Hat
Last Saturday (March 28, 2026), I went to the No Kings protest. A few days prior, I realized it would be a very cold day. Since I had been thinking about making a USA Flag-inspired version of the Carousel Hat for a while, I thought this would be a perfect occasion to wear it. Plus, knowing the hat knits up quickly and having some leftover yarn from making the samples for the Carousel Collection, I thought this was a very doable project.
First, I needed to find how many stripes were in half the hat in my size because I wanted it to be half stripes and half stars. To find this number, I divided the pick-up stitches in the Brim (Page 4 of the Carousel Collection) by 6. The result is the number of stripes in half of the hat. The number I got was odd, which was perfect because, just like in the flag, I wanted to start with a red stripe and end with one. I went ahead and got started with the ‘stripes’ half of the hat, following the pattern as is until I reached the number of stripes I needed.
Note: All sizes except the smallest and largest will result in an odd number of stripes. If you are knitting either the smallest or the largest size, you can add an extra stripe or leave the last one out so you have a red stripe bordering the ‘stars’ half of the hat. You can then either add or subtract that stripe’s worth of rows from the ‘stars’ half of the hat.
Secondly, I needed to figure out how to keep track of the number of stripes in the ‘stars’ section of the hat. To do that, I decided to add white bobbles to the first rows of each stripe section of the pattern, except the very first one. To keep the bobbles relatively small and neat, I made 3-stitch bobbles (see description below). The bobbles are spaced five stitches apart and worked until you have to make double stitches to shape the crown of the hat. So, in the first and every other bobble row, I worked [k5, make bobble] until I got close to the crown. In alternating rows, I knitted 3 stitches to offset the bobbles, then repeated the [k5, make bobble] pattern.
Thirdly, I didn’t want the bobbles to be big, so I opted for 3-stitch bobbles. To do this, I joined white yarn and:
Row 1 (RS): Kfbf (knit into front, back, and front) of the next stitch. Turn work. [2 stitches increased]
Row 2 (WS): Purl 3, turn work.
Row 3: Knit 3, turn work.
Row 4: Repeat Row 2.
Row 5 (RS): K3tog. [2 stitches decreased]
This is how I knitted the bobbles, but instead of turning work for WS rows, I just worked those rows from the RS and backward. See my short demo on knitting bobbles this way; it makes them easier and faster.
I carried the white yarn behind work between each bobble and cut it at the end of the bobble row, making sure the floats weren’t tight. After I finished the hat, I didn’t like how the loose-ish floats made the bobbles look wonky and uneven. I snipped the floats in half and tied the two strands of each bobble together. This made a big difference, making the bobbles look smaller and neater.
I worked the brim and pompom as described in the pattern.
Pattern: Carousel Collection
Yarn: Purl Soho Hedgerow