Last Halloween, our family dressed up as the characters from Star Wars. We had been planning to DIY all of our costumes, but there was a good deal on the kids’ costumes in our local mall. So, that left my husband and me to DIY ours, but as the time got closer, hubs caved in and ended up ordering his Han Solo outfit online. I was still determined to make my costume by hand, partly because I really didn’t want to spend $50+ on a simple, flimsy costume and partly because DIY’ing is fun! I figured Princess Leia’s outfit would be easy to pull off since all I needed was a big white cloth to drape as a dress. For hair, I thought I’d use a brown skein of yarn shaped into something resembling Leia’s iconic hairstyle with two buns, but I couldn’t make it work. What does a knitter do when all fails? We knit! I already knew how I’d create the buns, but the main part of the hair required some thinking. I ended up going for a simple rectangle that would be gathered at the ears, which is where I planned to attach the buns. I decided to use the garter stitch for the main part of the hair, and for the buns, I wanted to create more reliefs and chose to knit two rounds and purl two rounds. I stuffed the buns with poly fiberfill from Joann’s, but now I think I could have used the natural fiber I have plenty of. If you’d like to make your own knitted wig, I wrote the step-by-step directions below. Hope you have fun making and wearing it!
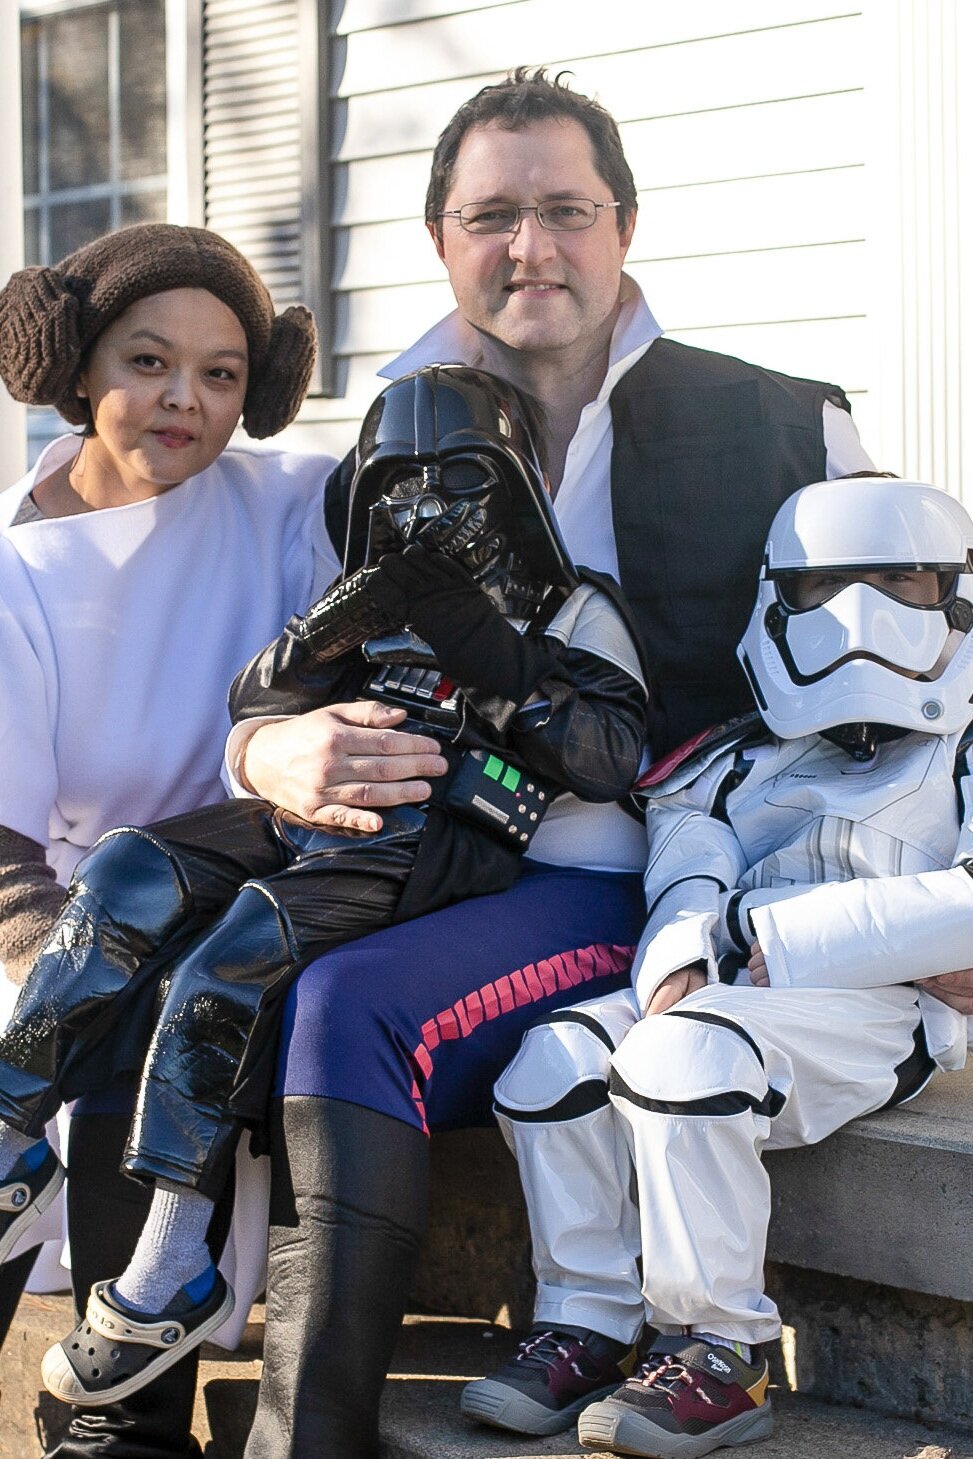
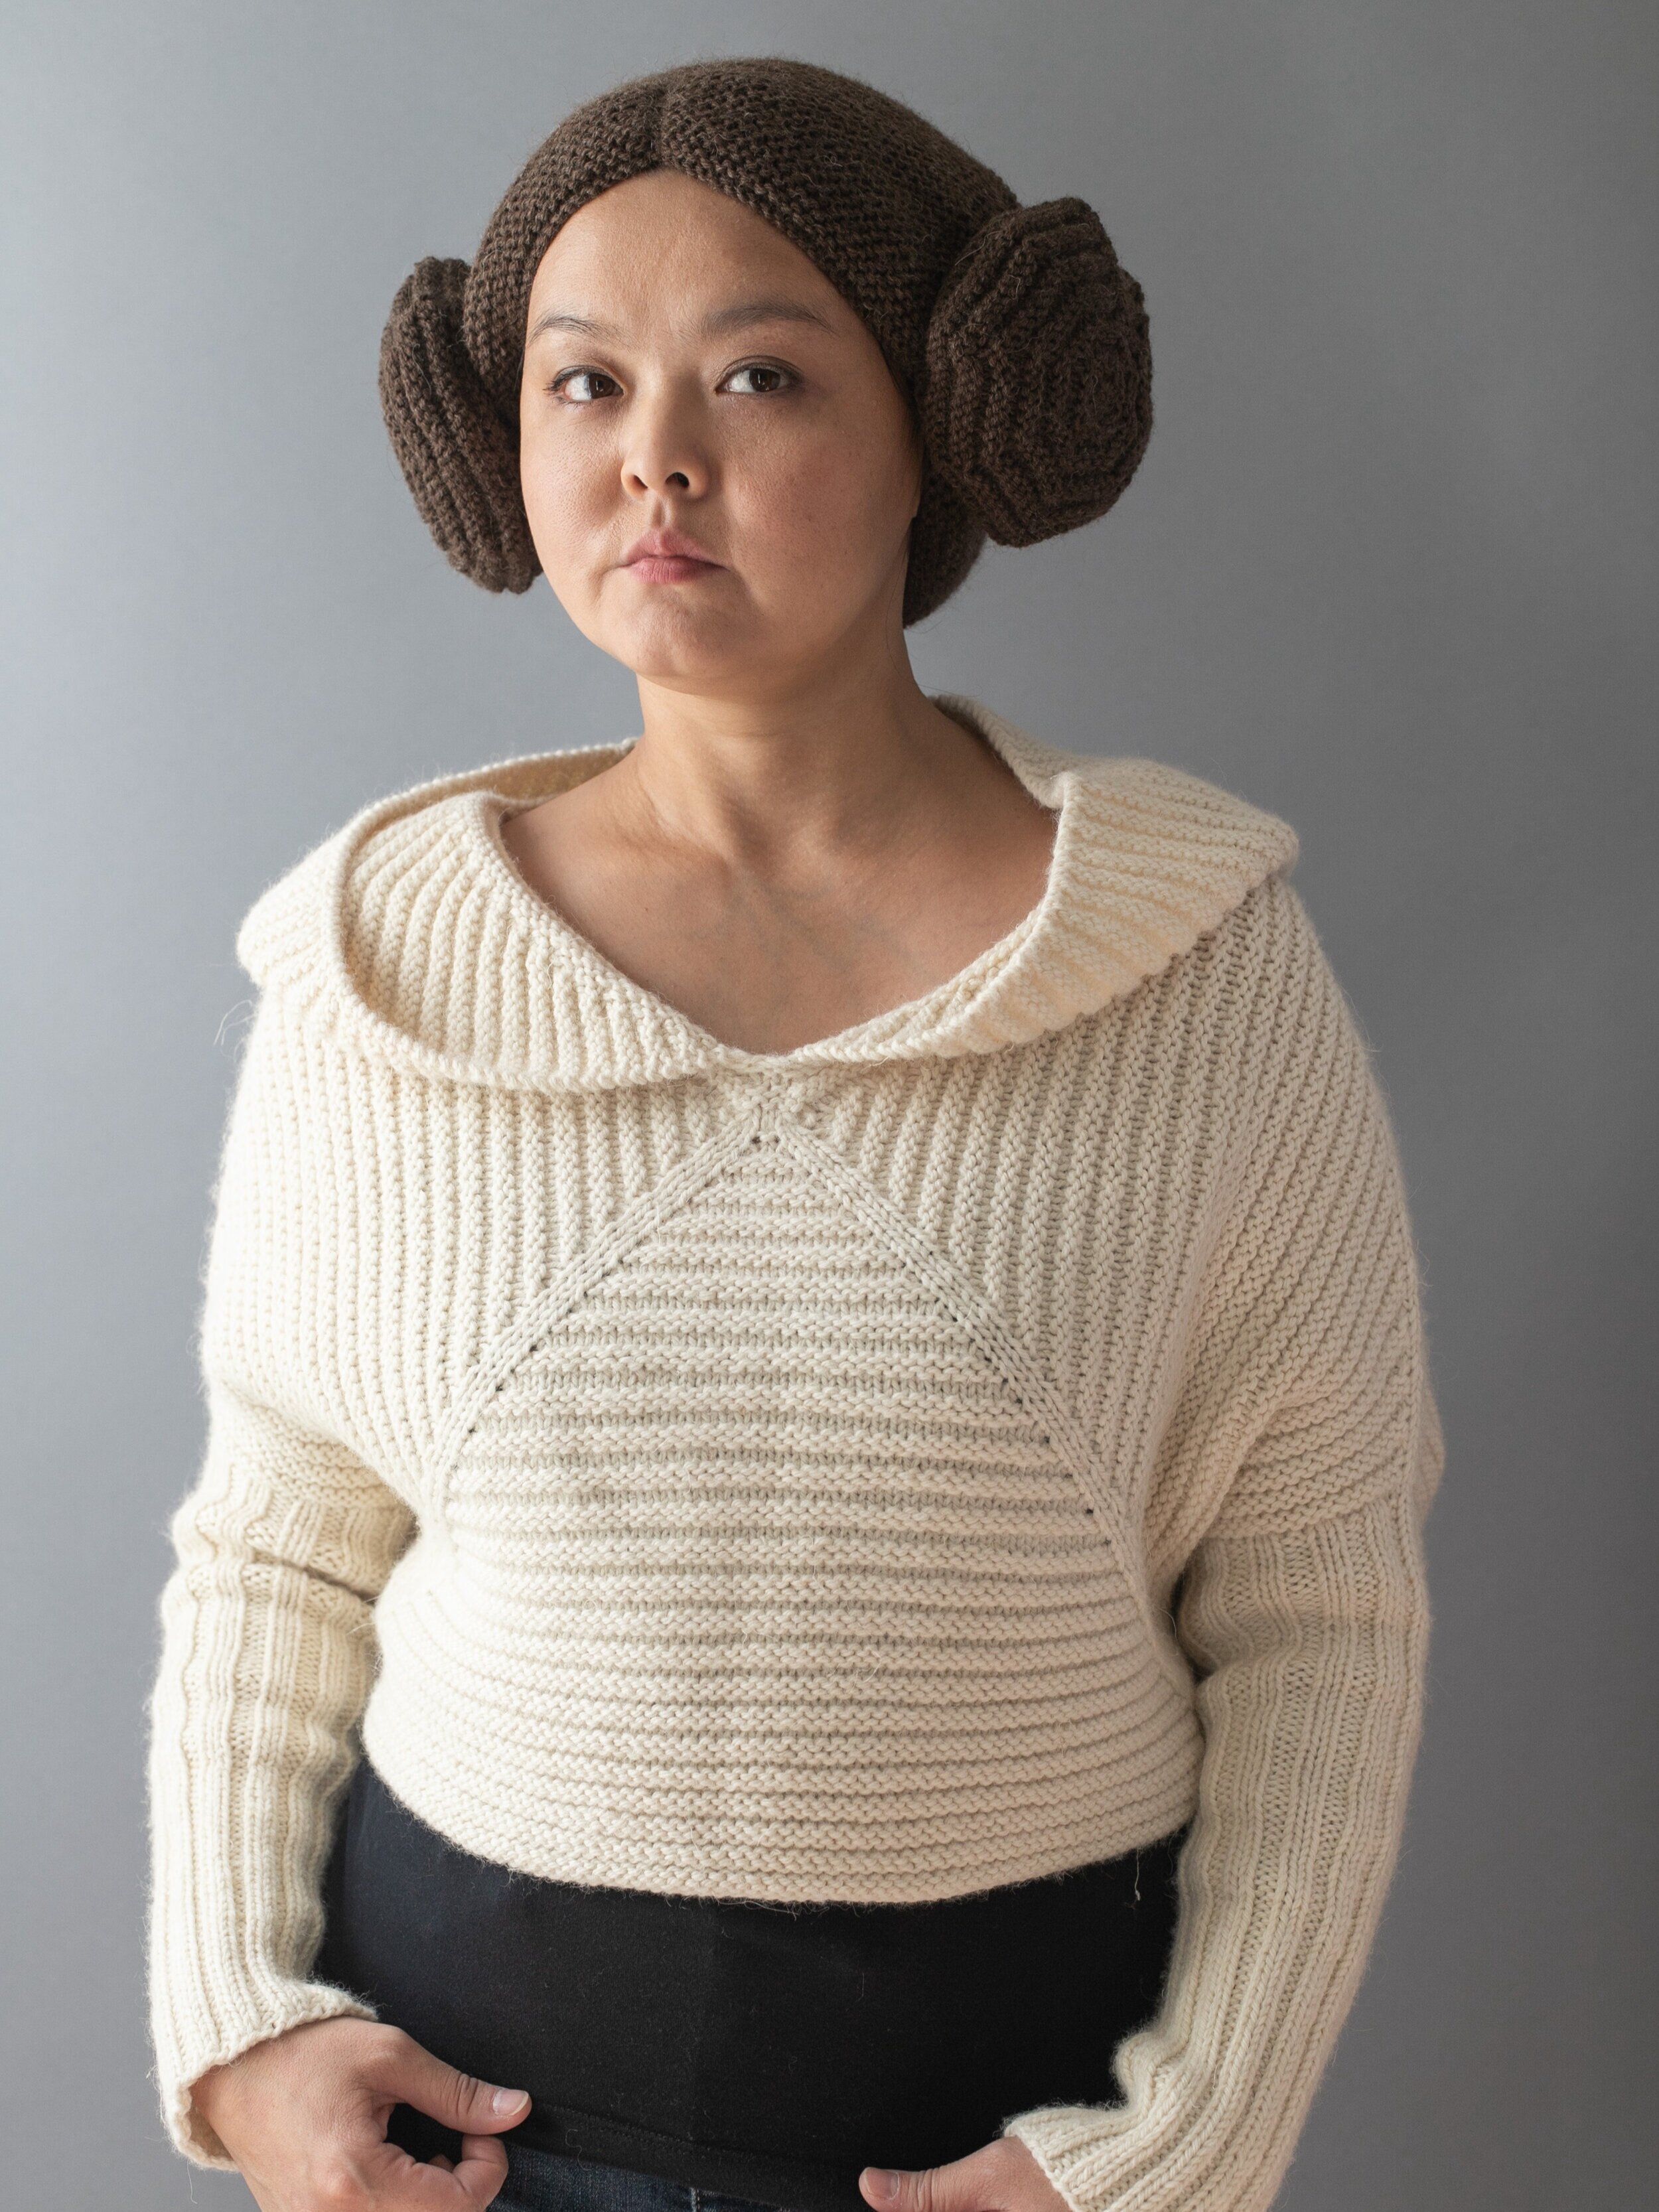
Photo on the left: Halloween 2020, on the right: almost Halloween 2021 (I paired my knitted wig with Center Point Popover for a complete knitted outfit :D)
supplies
yarn in preferred weight and color (I used 260 yards of Lion Brand Fishermen’s Wool, worsted/aran weight, 100% wool, 465yd/8oz, Nature’s Brown colorway)
knitting needles in a size that is recommended for the yarn weight you’ll be using (I used US 7 32” circulars - I’m a loose-knitter btw :)
8 stitch markers
tape measure
ruler
tapestry needle
fiberfill (I used poly fiberfill from Joann’s)
Instructions
1. Make a swatch to determine your stitch gauge per inch (A) and row gauge per inch (B) in Garter Stitch.
For example, I got 18 stitches x 36 rows in 4”, so my A = 4.5 (because 18 / 4 = 4.5) and B = 9 (because 36 / 4 = 9)
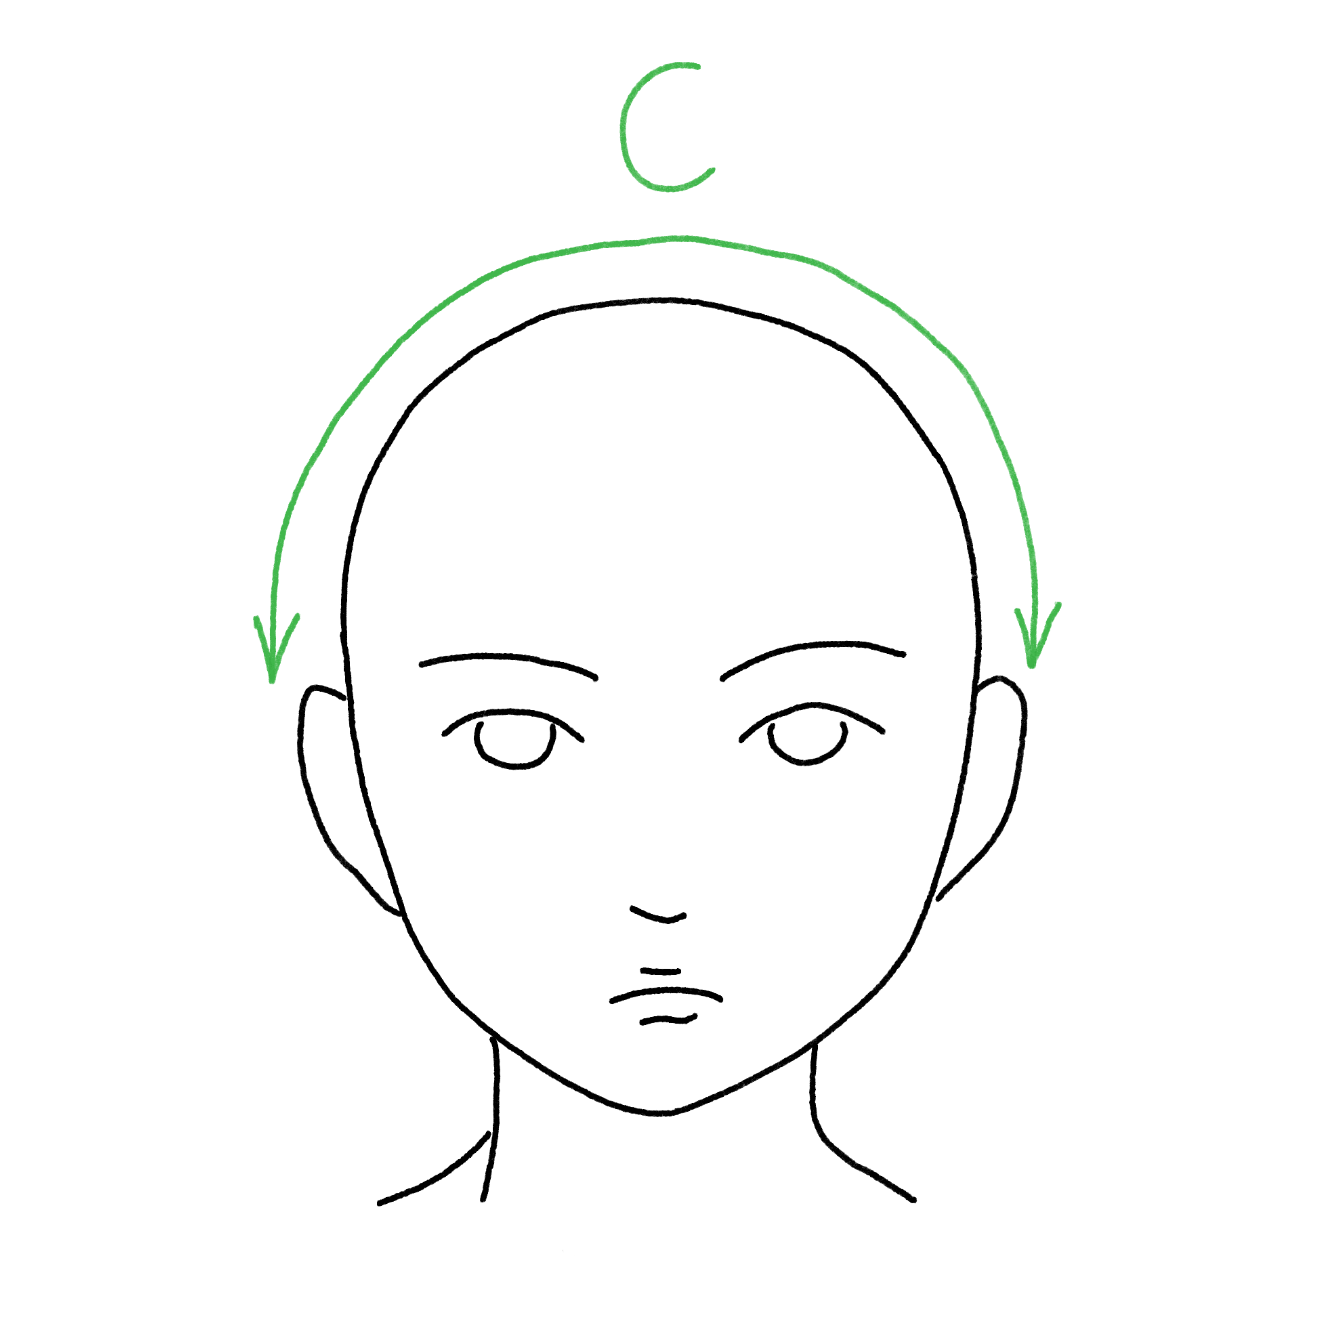
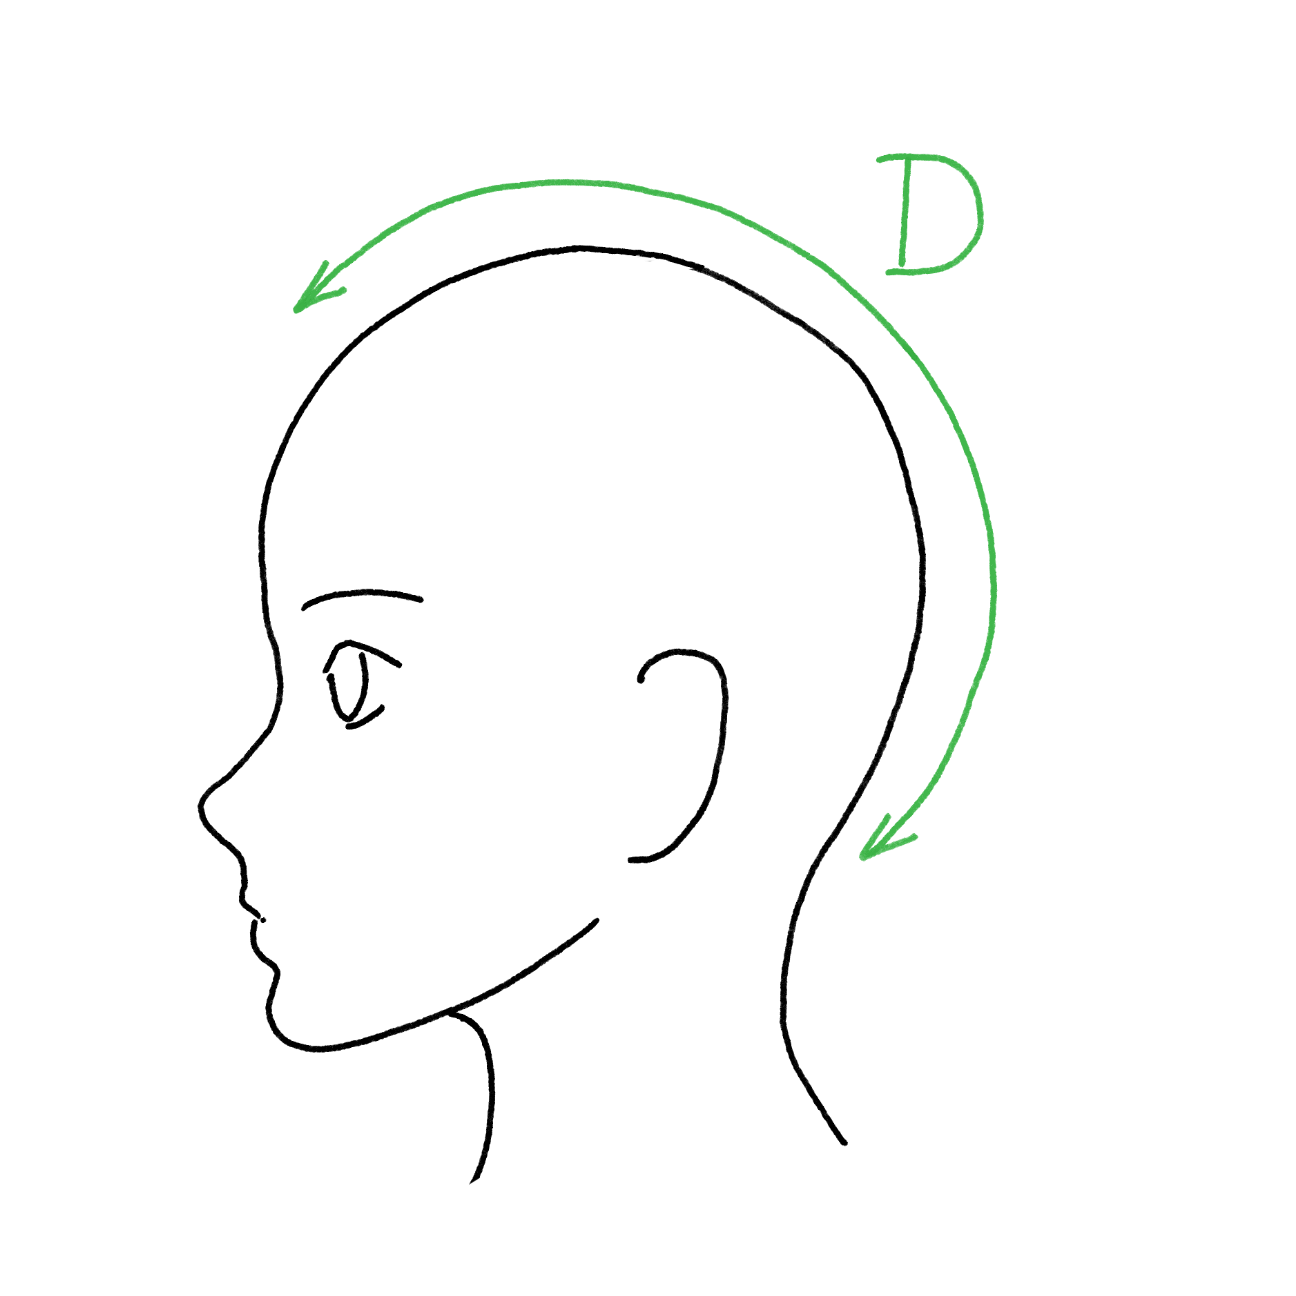
2. Measure C and D using a tape measure.
I measured my head, which is approximately Size M (my head circumference is 22”), and I got C = 13” and D = 14.5”
3. Multiply C by A and round it to the nearest odd number. This is E (this is the number of stitches you’ll cast on).
Since my C is 13” and A is 4.5, my E = 13 x 4.5 = 58.5. I rounded to the nearest odd number and got 59.
4. Multiply D by B and round it to the nearest even number. This is F (this is the total number of rows you will work).
Since my D is 14.5” and B is 9, my F = 14.5 x 9 = 130.5. I rounded to the nearest even number and got 130.
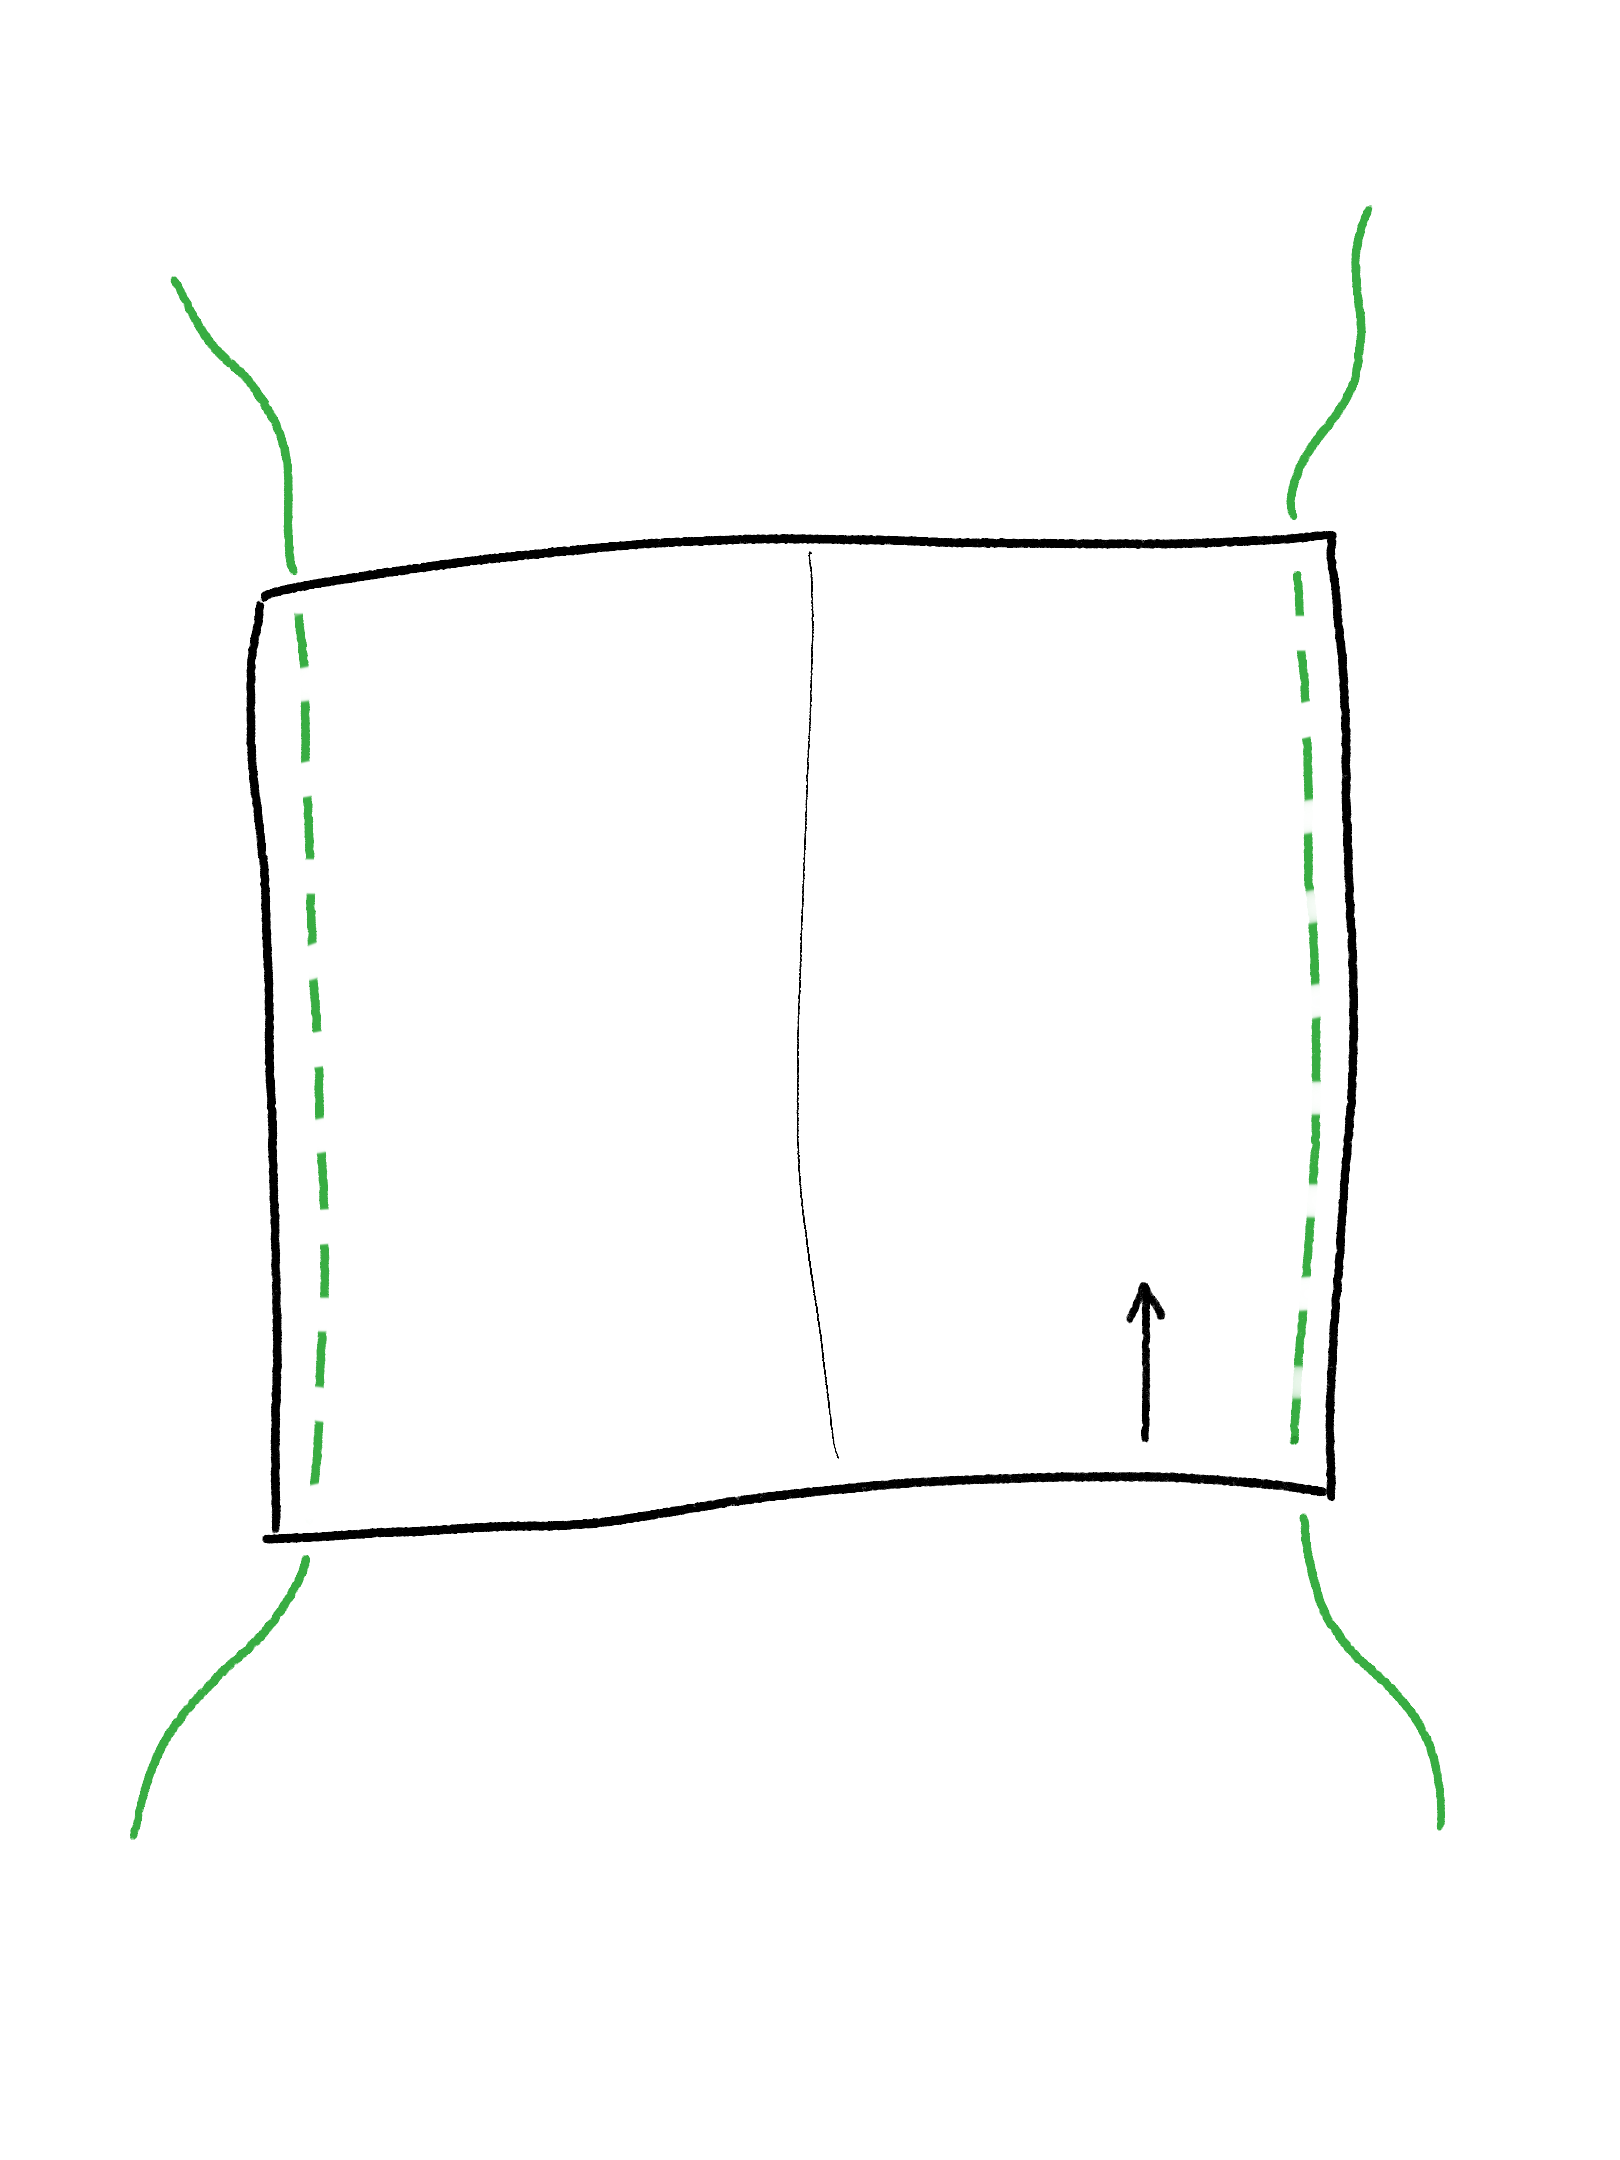
5. Make the main part of the hair as follows:
Cast on E (I cast on 59 stitches).
Set-up (wrong side): Knit (E-1)/2, place marker (pm), k1, pm, knit to end.
(I knit 29 (because 59-1=58, 58/2=29), pm, k1, pm, knit to end.)
Row 1 (right side): Knit to marker, slip marker (sm), slip 1 with yarn in front, sm, knit to end.
Row 2: Knit to end, slipping markers as you come to them.
Repeat Rows 1-2 until you get a total of F.
(You can also drape your knitting over your head to make sure it covers your head from the front hairline to the nape.)
Bind off stitches.
6. Using a tapestry needle and running stitch, gather the two sides of the main hair with brown yarn. Tie the ends to secure them.
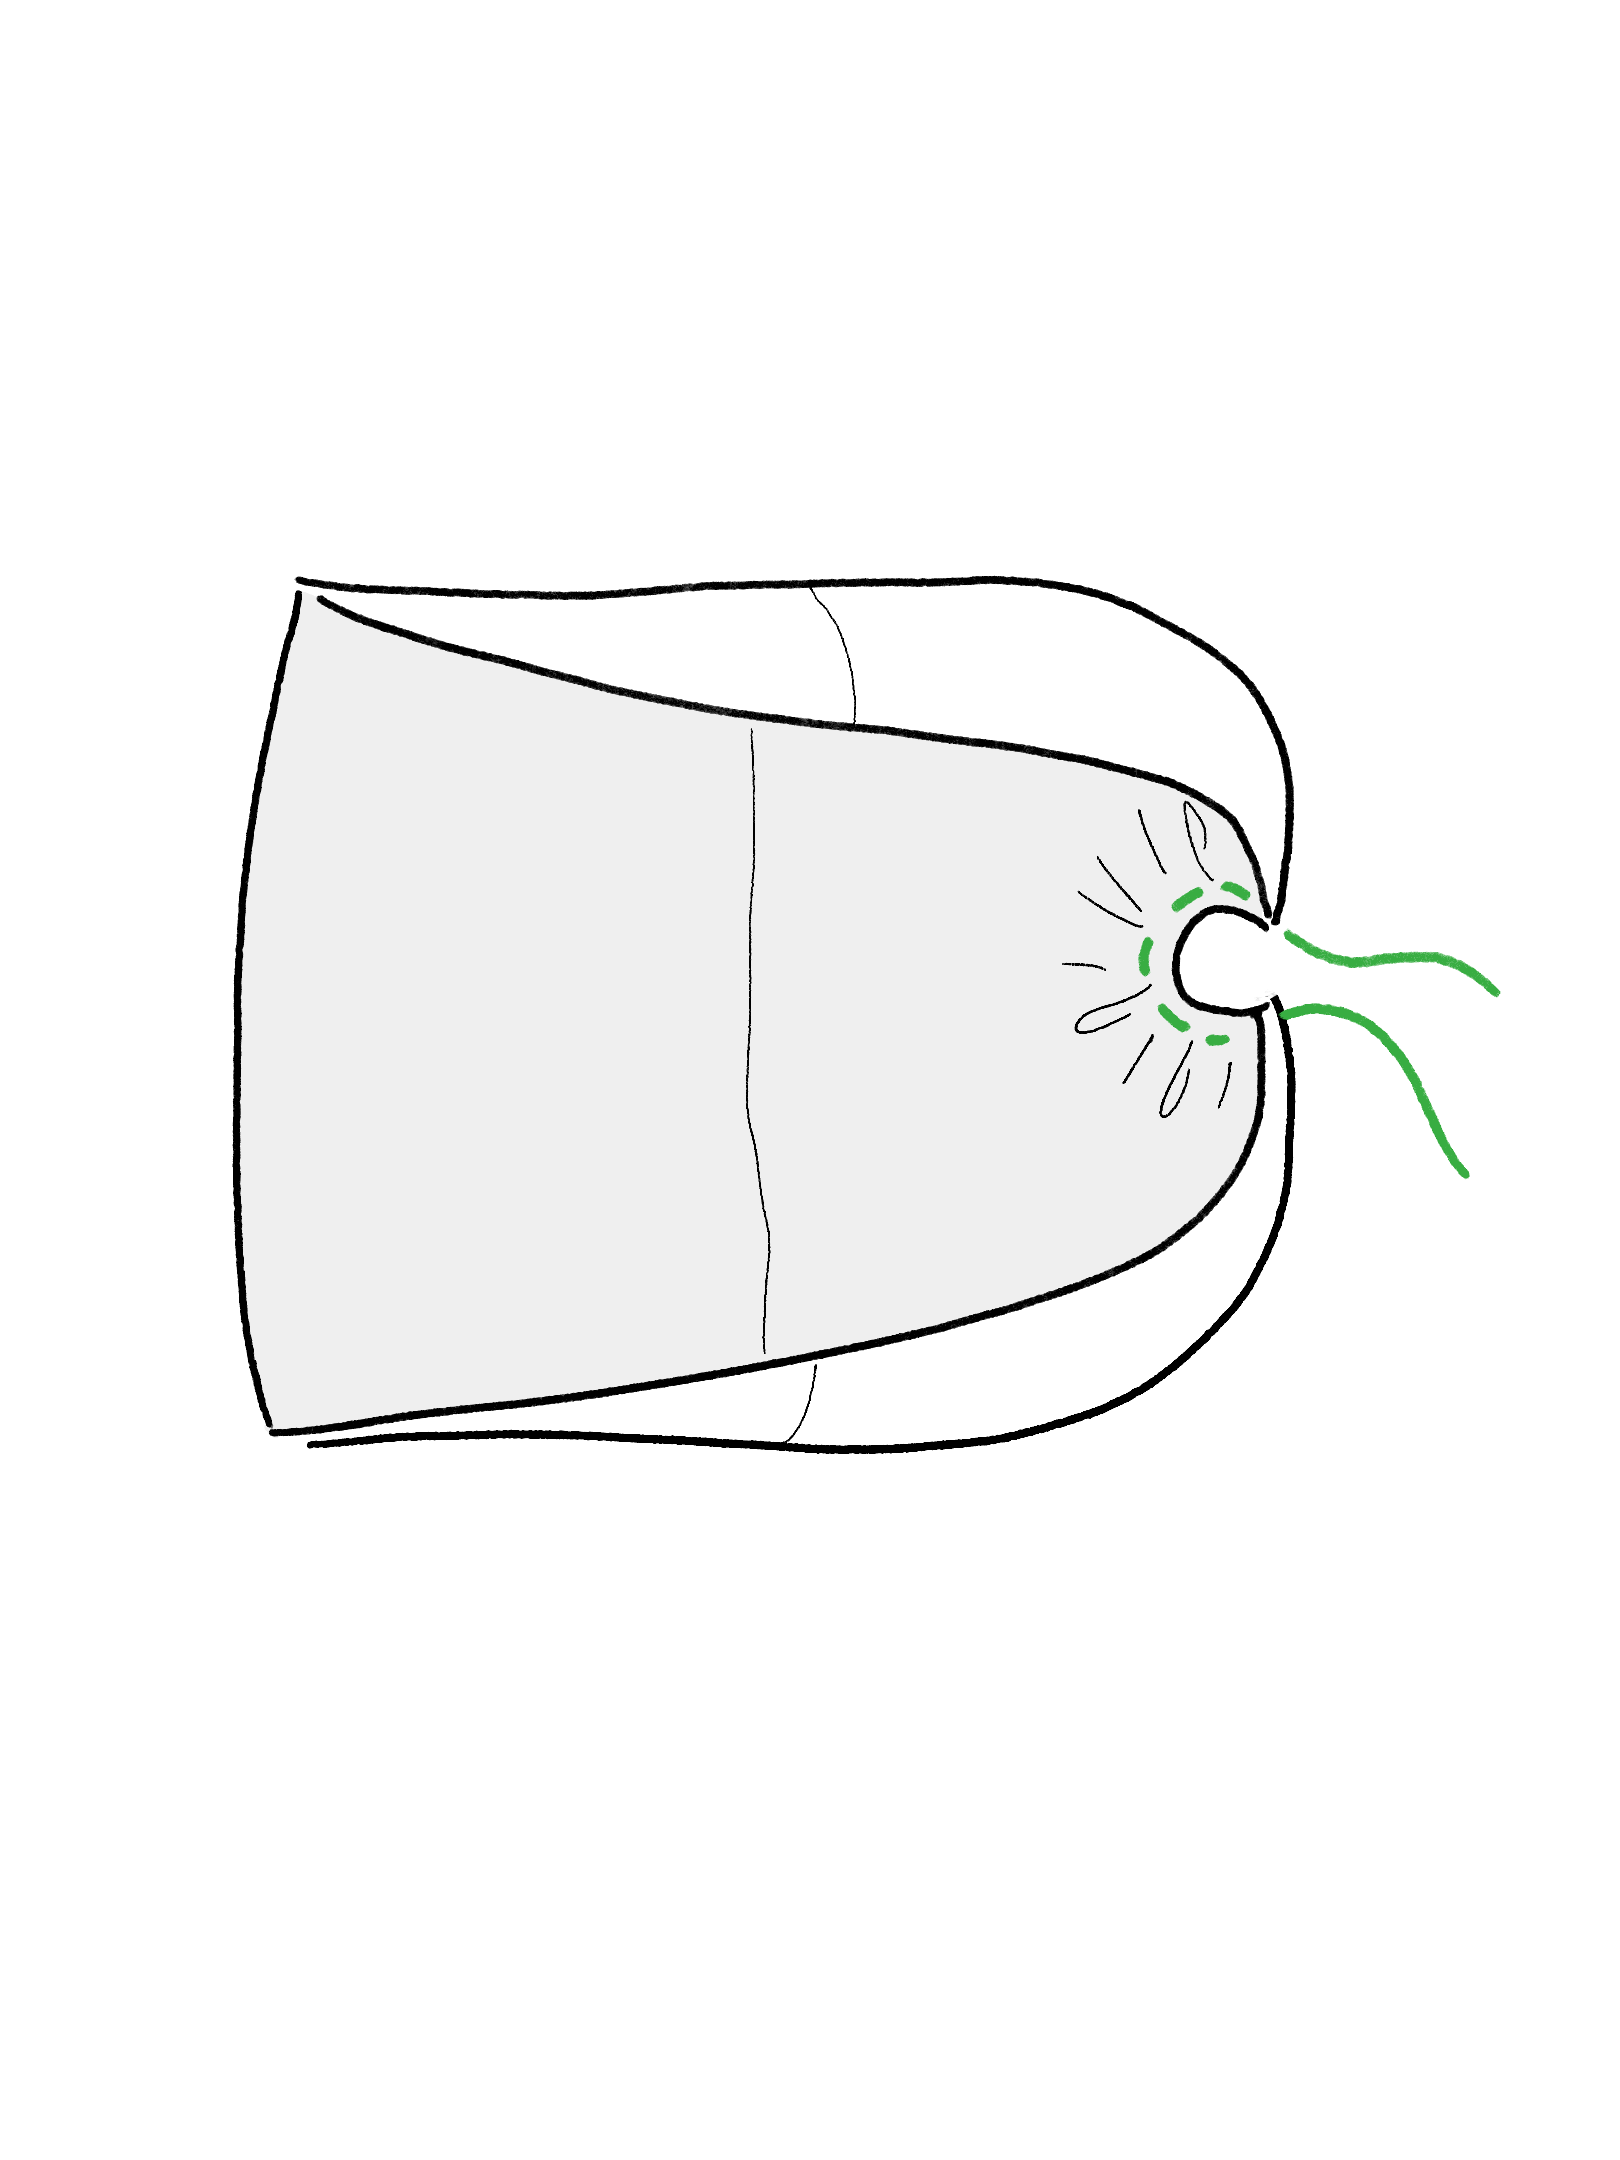
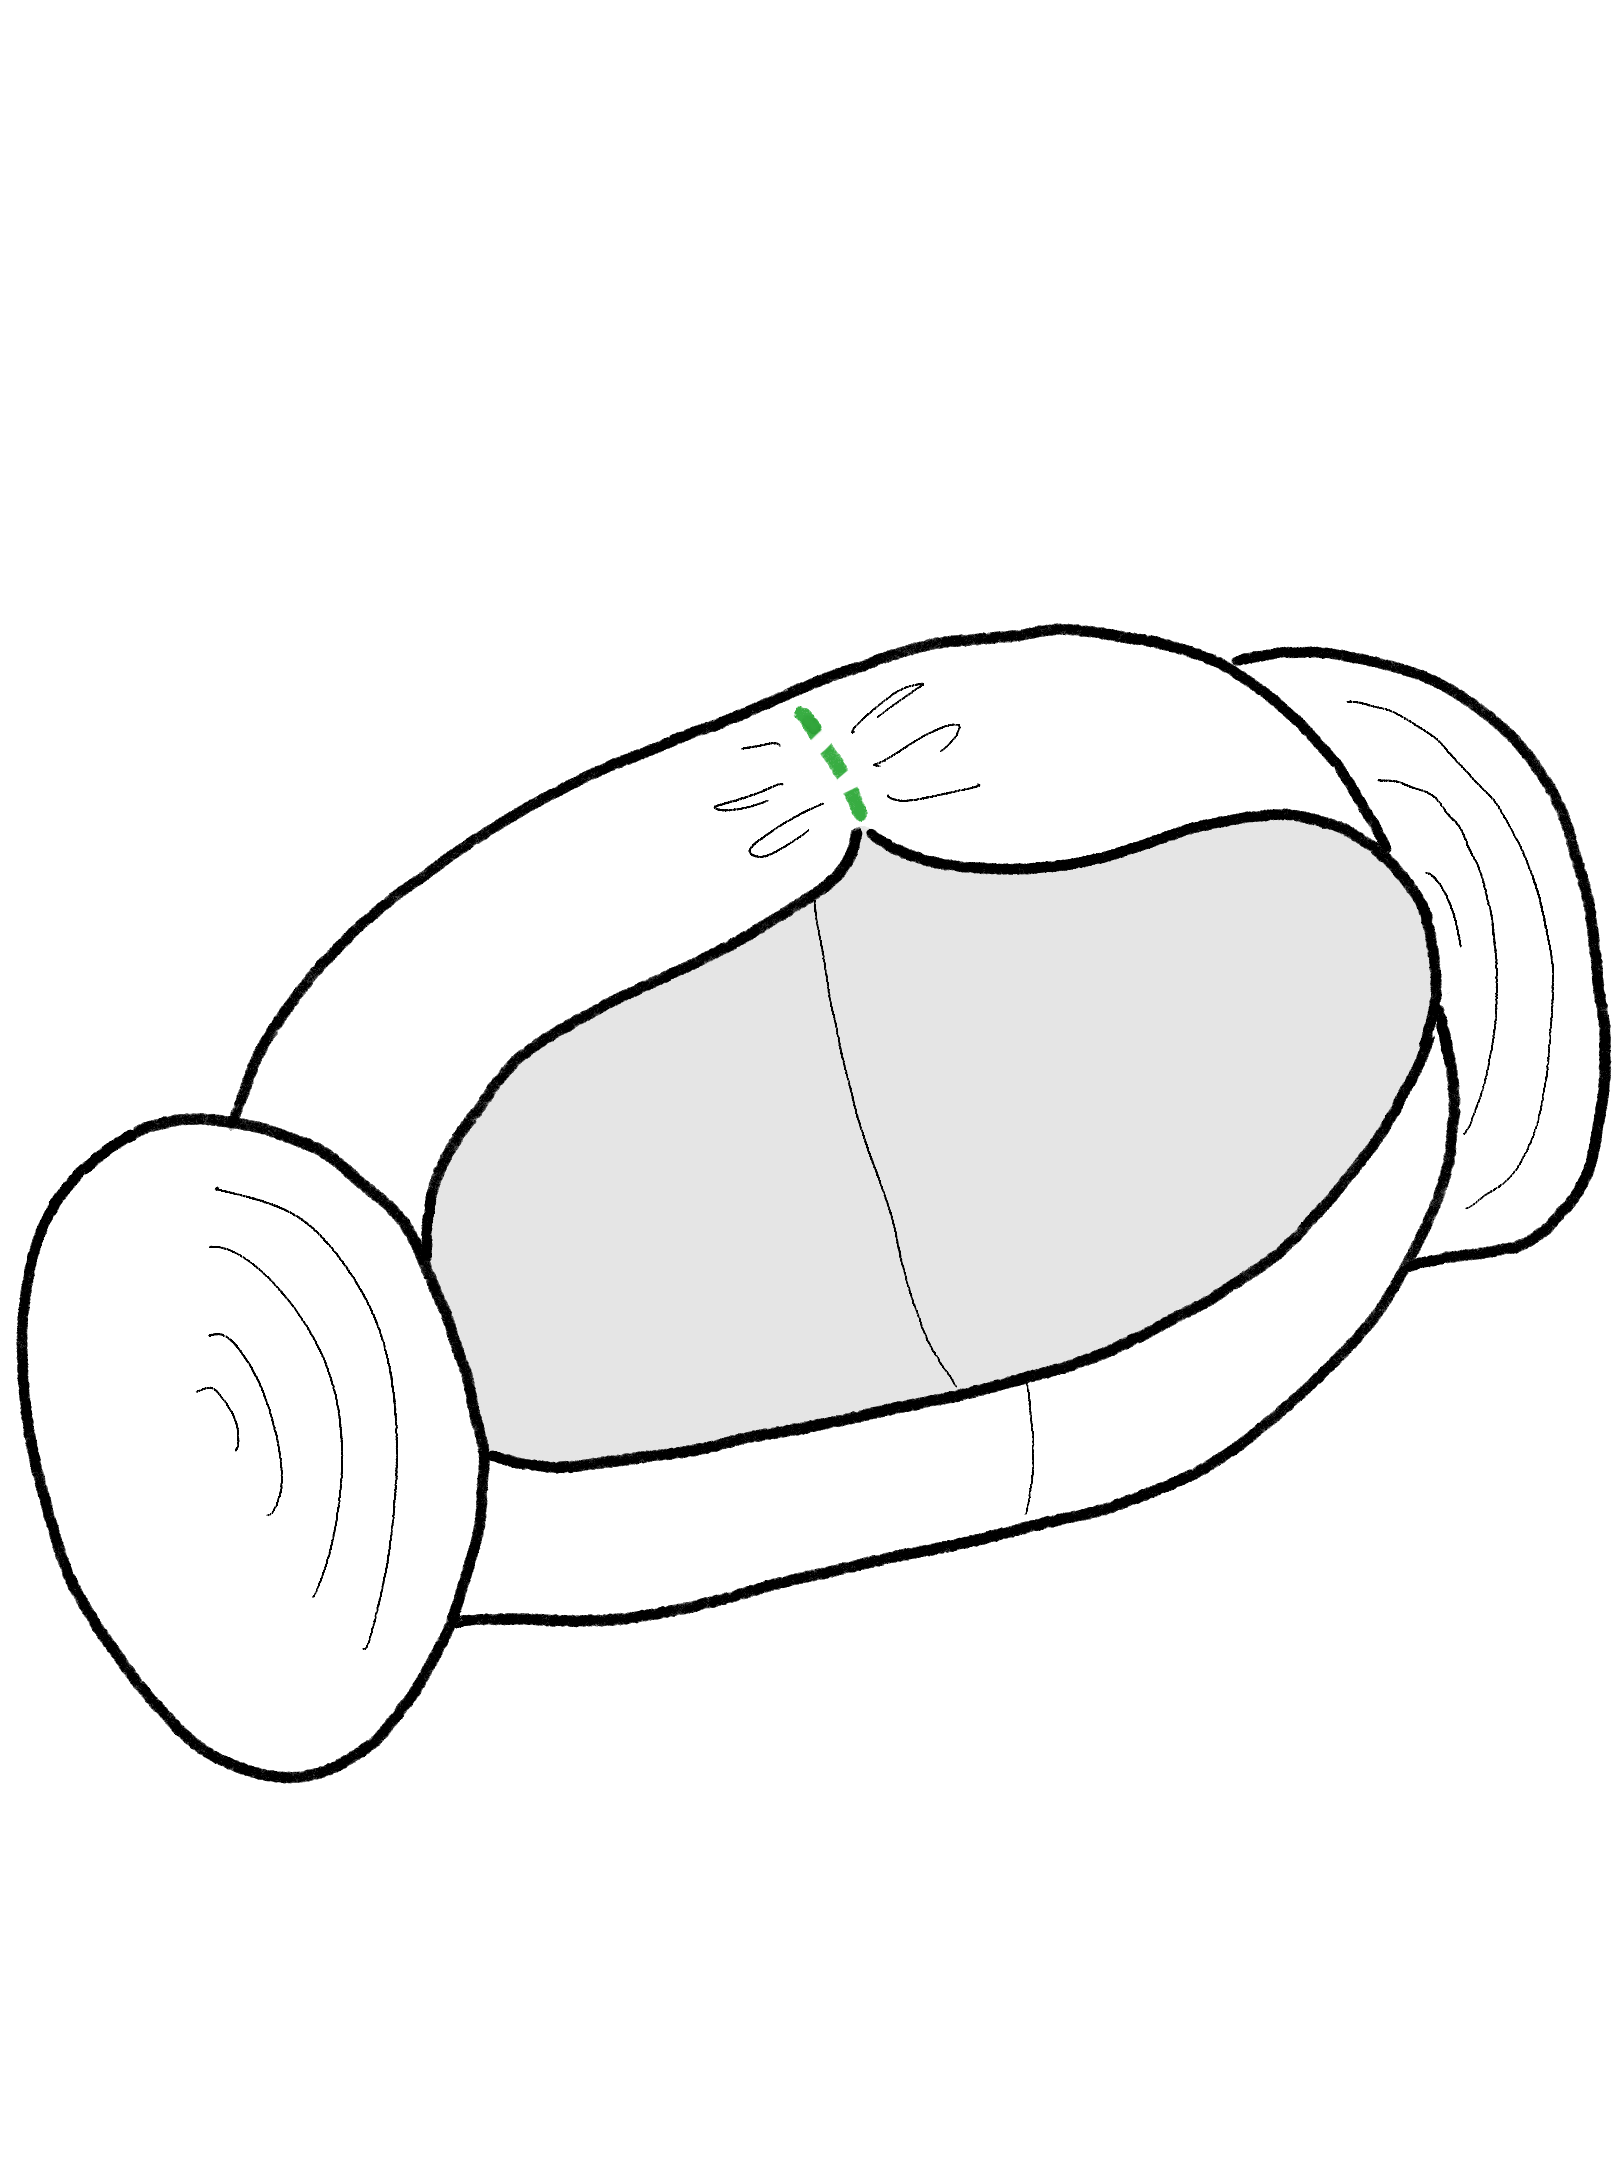
7. Make the buns as follows:
Cast on 8 stitches on double-point needles (or circulars for magic-looping). Join to work in the round.
Round 1: [K1, make 1 backwards loop (m1 BL), pm] 8 times. [16 stitches and 8 markers total]
Round 2: Knit to end, slipping markers as you come to them.
Round 3: [P2, m1 BL, sm] 8 times. [24 stitches total]
Round 4: Purl to end, slipping markers as you come to them.
Round 5: [Knit to marker, m1 BL, sm] 8 times. [8 stitches increased]
Round 6: Knit to end, slipping markers as you come to them.
Round 7: [Purl to marker, m1 BL, sm] 8 times. [8 stitches increased]
Round 8: Purl to end, slipping markers as you come to them.
Repeat Rounds 5-8 until you reach the necessary diameter (mine is 5.5”).
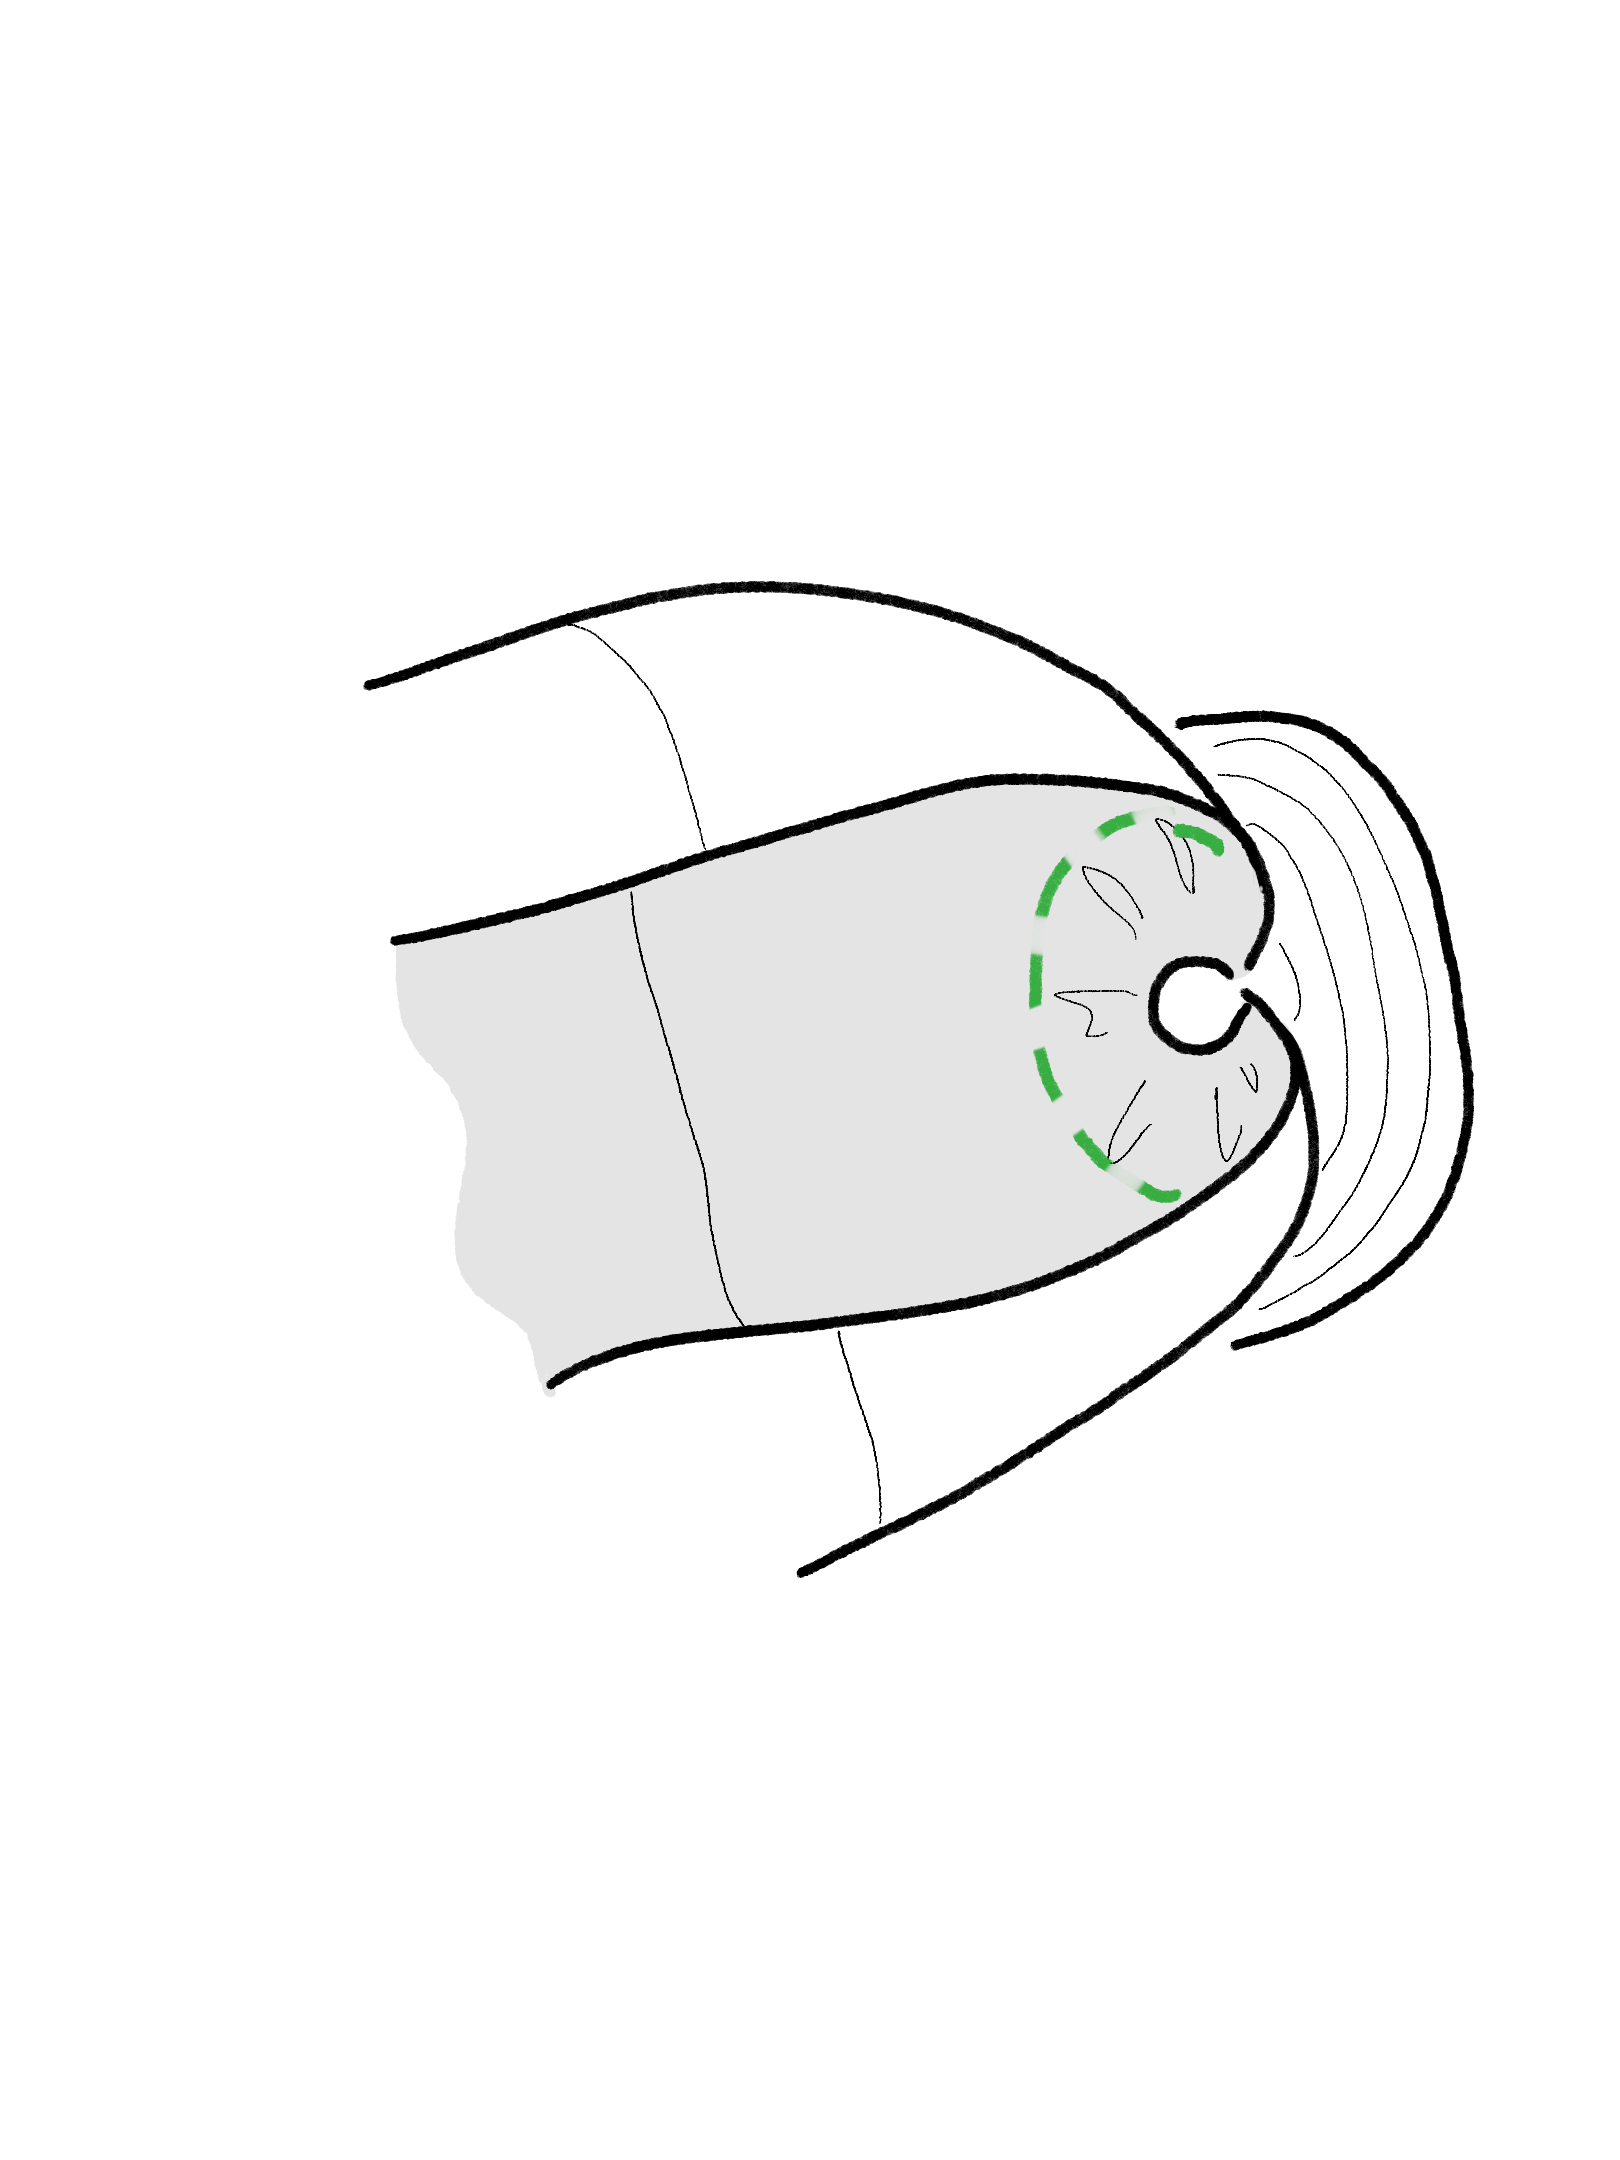
Next round: [Knit to 2 stitches before marker, knit 2 stitches together (k2tog), sm] 8 times. [8 stitches decreased]
Next round: Knit to end, slipping markers as you come to them.
Next round: [Purl to 2 stitches before marker, purl 2 stitches together (p2tog), sm] 8 times. [8 stitches decreased]
Next round: Purl to end, slipping markers as you come to them.
Repeat the last 4 rounds until you have an opening through which you can fill the bun with fiberfill.
Continue working in the established pattern until 8 stitches remain. Cut yarn, leaving an 8” tail. Using a tapestry needle, feed the tail through the remaining stitches, tighten and secure.
Make a second bun. Weave ends in.
8. Attach the buns to the main hair using a running stitch on the wrong side of the main hair.
9. (Optional) Use a running stitch on the wrong side of the main hair to gather and lift the hair parting in the front center.
I’d love to see your finished wig! Please tag me @MamasTeddyBear and use #PrincessLeiasKnittedWig on Instagram so I can see your awesome hair and outfit!